You’ll Thank Me For This One
Let me get one thing out of the way first. Some will say why not just use a shooting board? I’m not interested in this argument but I outline my reasons a couple of paras down. This guide will knock your socks off, no messin’.
Most end-grain planing is square ended for me, and I’m sure that’s the same for most. Usually, my mitres need one or two quick shavings freehand and it’s as close to a 45º as it needs to be. If it’s half a degree out at 44.5º I make the next one 45.5º. I work around the mitres and they always come out for a mirror or picture frame. I know. It doesn’t seem right. Well, I can also get them to dead-on 45º in one plane and 90º in the other if I want to. It’s just up to me. Oh, and usually that is with a regular #4 Stanley. I just set the guides to 45º and push––hand, eye and all of the upper body including breathing control. Dead simple.

I just made a mirror frame and didn’t once check the mitres for 45º. The last mitre slipped into place and was utterly gapless with all of the corners meeting dead on. I’m always micro-adjusting but could never explain in the doing of it what I flex to make it work. In my most recent frame, not the one above, none of the mitres were trimmed or planed at all from the saw. This is the reward of self-discipline and training your eyes to see angles for what they are. Square ends are often more critical to my work because everything I make corresponds to a vertical and horizontal. In any given piece I make there might be two hundred ends that need squaring. In a picture frame, there are just eight.
Because we hand-tool woodworkers tend to use chopsaws less, I haven’t used one in years, our end grain usually needs additional work after crosscutting and that can set us back a little timewise. In all of my projects, whether I use the bandsaw or the handsaw, the ends must be trimmed a fraction more and all the more on some components more than others.

Now anyone watching me will watch me simply grab the plane and plane the end-grain square and smooth freehand and I was taught and had to do that as an apprentice when I started out at 15. Nothing got saved for a later date. Zero procrastination was the norm. Because of the amount of work we got through week on week the learning curve was fast, fast, fast. We planed mitres and squared ends throughout every day for different jobs. Chopsaws were not around yet and the crosscut was usually in some other process and was often tied up for days. I cannot expect my audience to master the techniques I use straight off the bat yet they must develop muscle memory as they go so that one day they can. Through the years we have used a couple of support aids in the shop––a common shooting board is a good example. But the issue with shooting boards is they take up valuable bench top space and always displace the in-use tools you need minute by minute and that means a lot of shuffling between tasks on a continuing basis. As it was with my mortise guide and other pieces, I developed a small vise system for planing end grain on boxes with small, short and narrow end grain surfaces that make it difficult to balance and align a plane sole to when squaring up, I have used it in some earlier videos occasionally and talked about it elsewhere.

But I also have the end-grain guide and support above that I want to introduce to you. Whether it’s a large end grain section or a small one, this works and works brilliantly. I used it on my last project where I had four large drawers with five pieces per drawer going up from 4″ to 8″ wide. It takes about 4-8 swipes with the plane to square each of the ends of my boards in stock 1/2″ to 7/8″ thick. It squares in both directions and though I did check each end as I went, it was a waste of time because every single time I used the guide the ends were dead on. That said, it does take a judicious cutting with the plane not to cut in a misaligned fashion and take material of your guide. I made about sixty square-end cuts using the guide and at the end of that work, it was still accurately cutting and trimming. But had it been out it would only take a few swipes with the plane to square everything up again. I calculate that this guide would likely last me for ten years of daily use with only mild occasional correction and it can be had from scraps of two-bys and scraps of 3/4″ plywood or solid wood.

The important thing in making the guide and carrier is to work accurately. My carrier works at both opposite ends. A two-for-one for right- and left-handed use if you like. You need this for shaped stock like tapered or modest moulded or shaped wood even though that is not the intended use of this guide. Straighten and square the face and edge of the main carrier so that the main wide face going against the plywood is flat and straight. Use winding sticks as you would normally. The plane you use will ride on the straightedge which sits at the top of the guide.
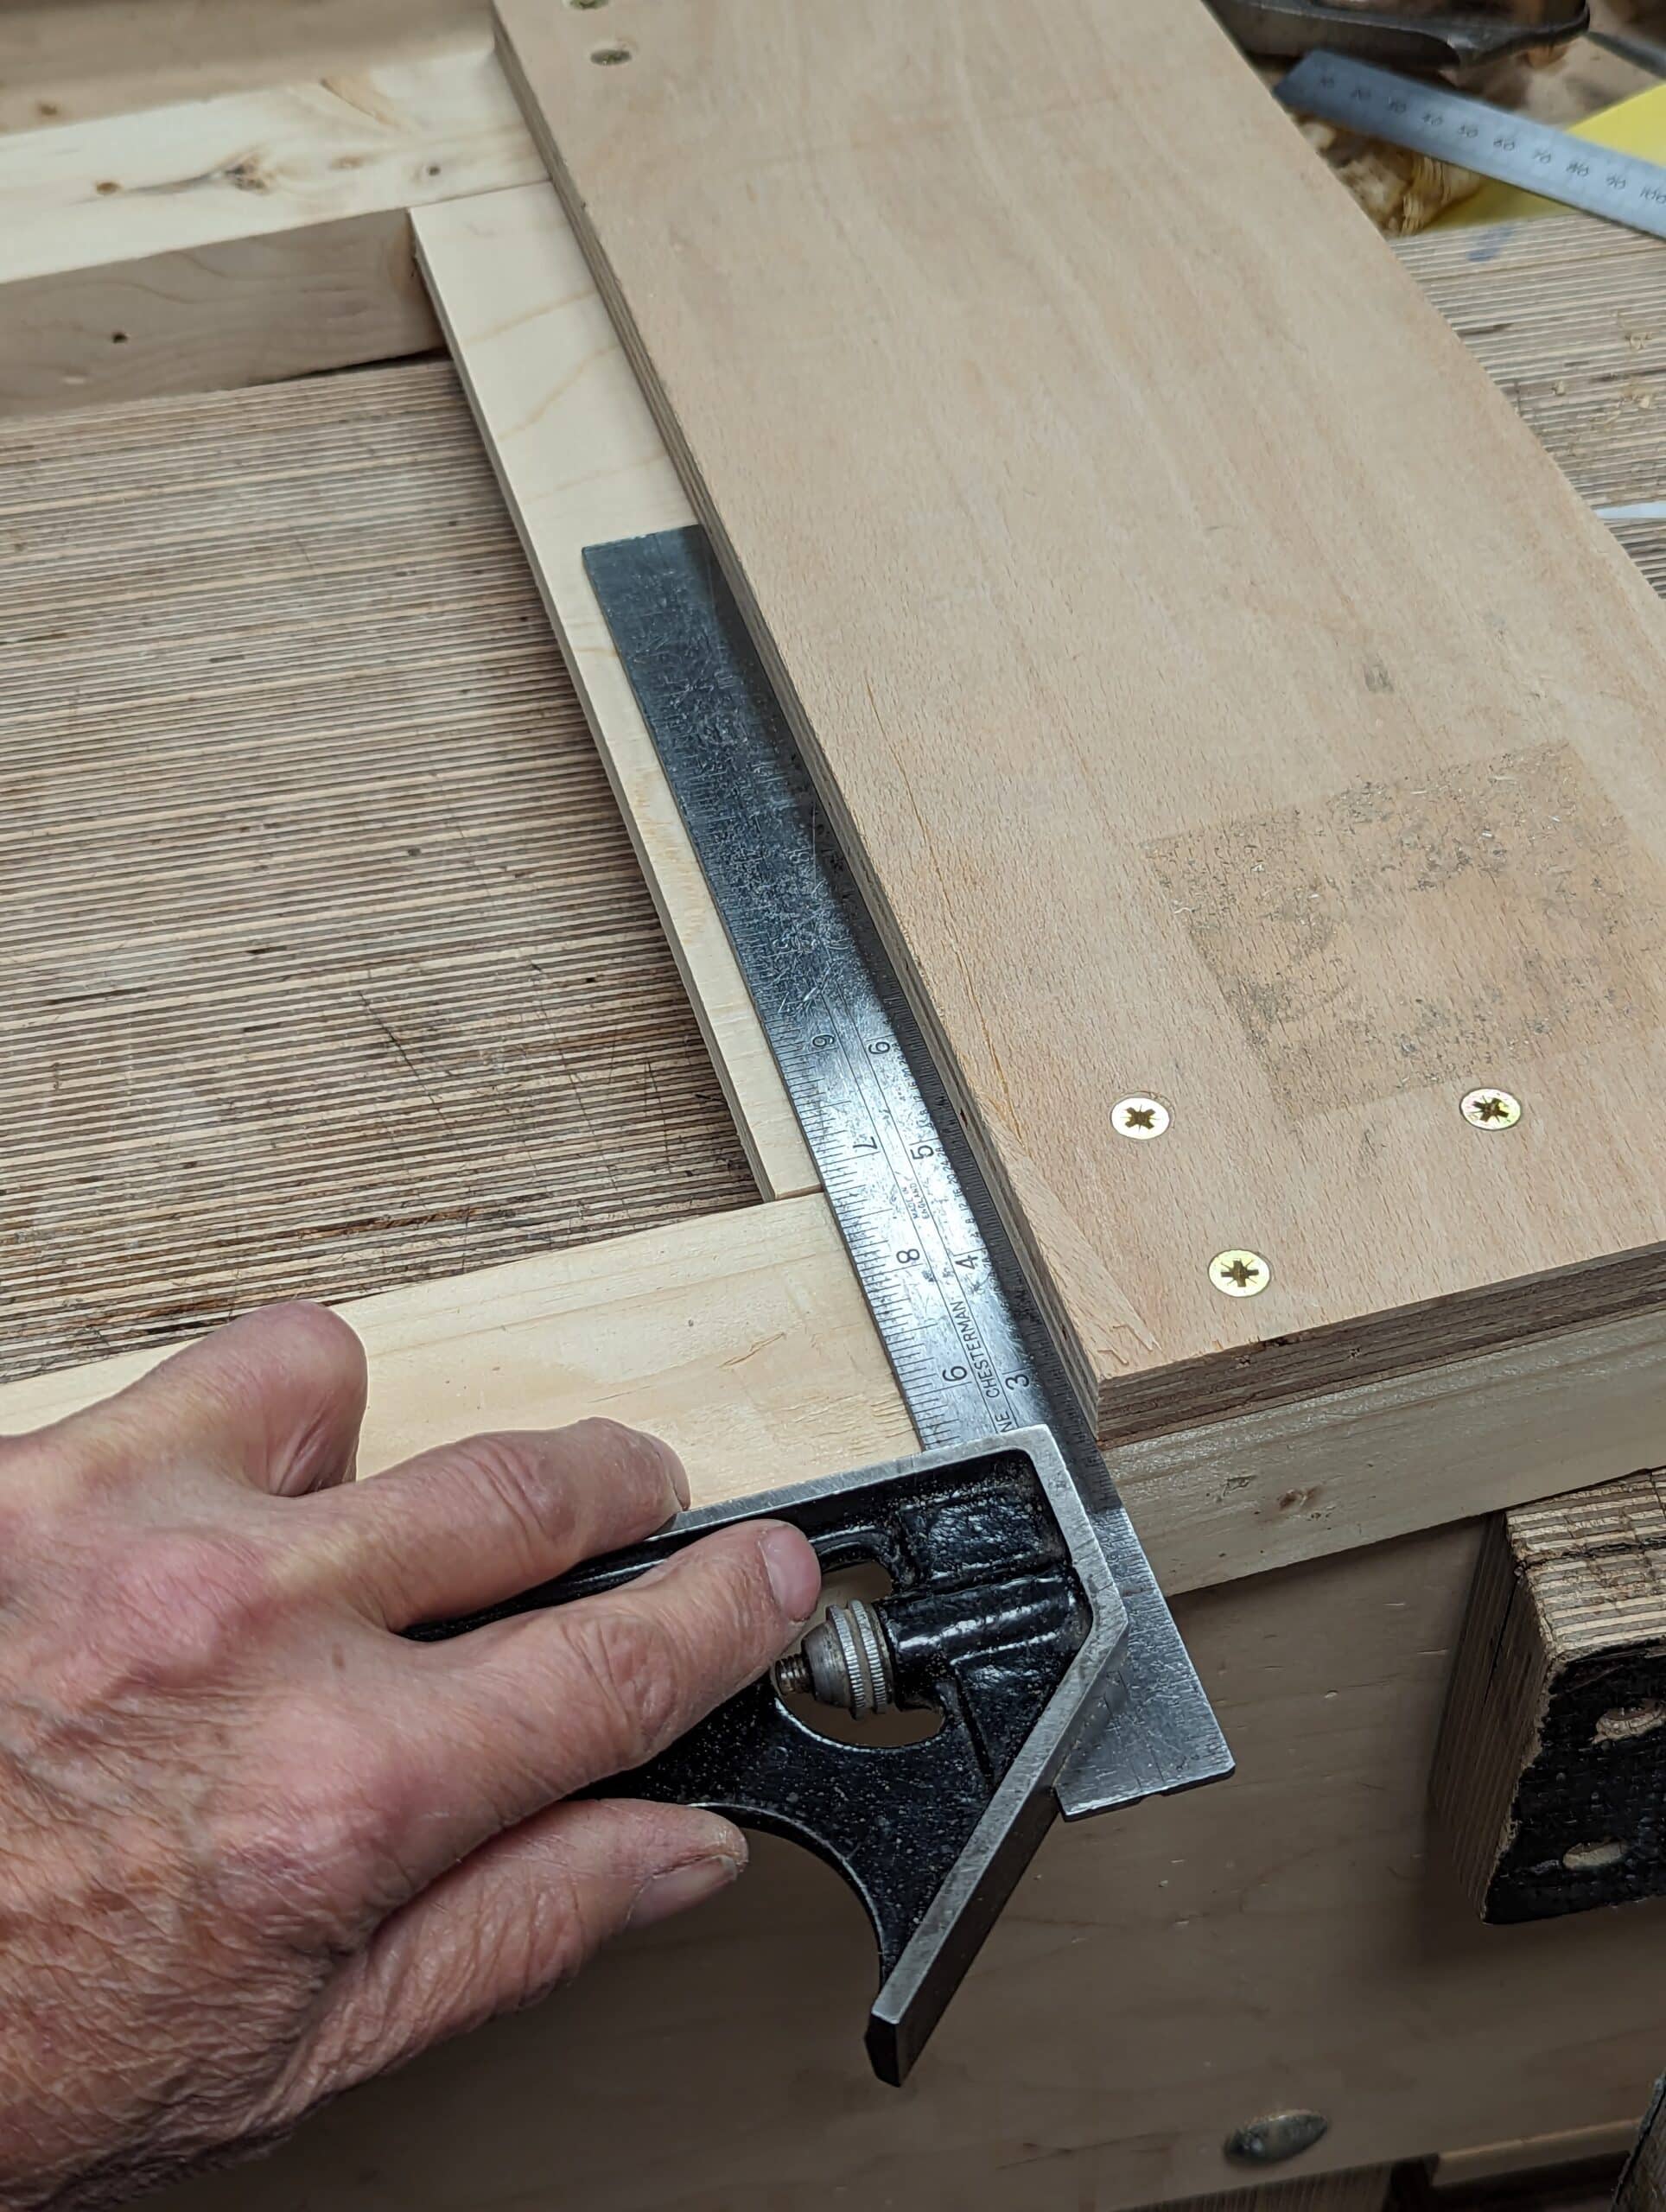
True the long edge of the plywood next. The edge must be dead straight along its whole length.

Now screw the plywood to the two-by as shown. Fix with one screw and then swivel to the square. I let my plywood stick past the end by a fraction and then, once set and square, add the additional screws.
Once done I use the carrier to guide my plane to level the end of the plywood to the two-by carrier. Having this dead on means that the outcut of the last plane stroke does not break off the end grain because it is totally supported and backed up by the plywood.
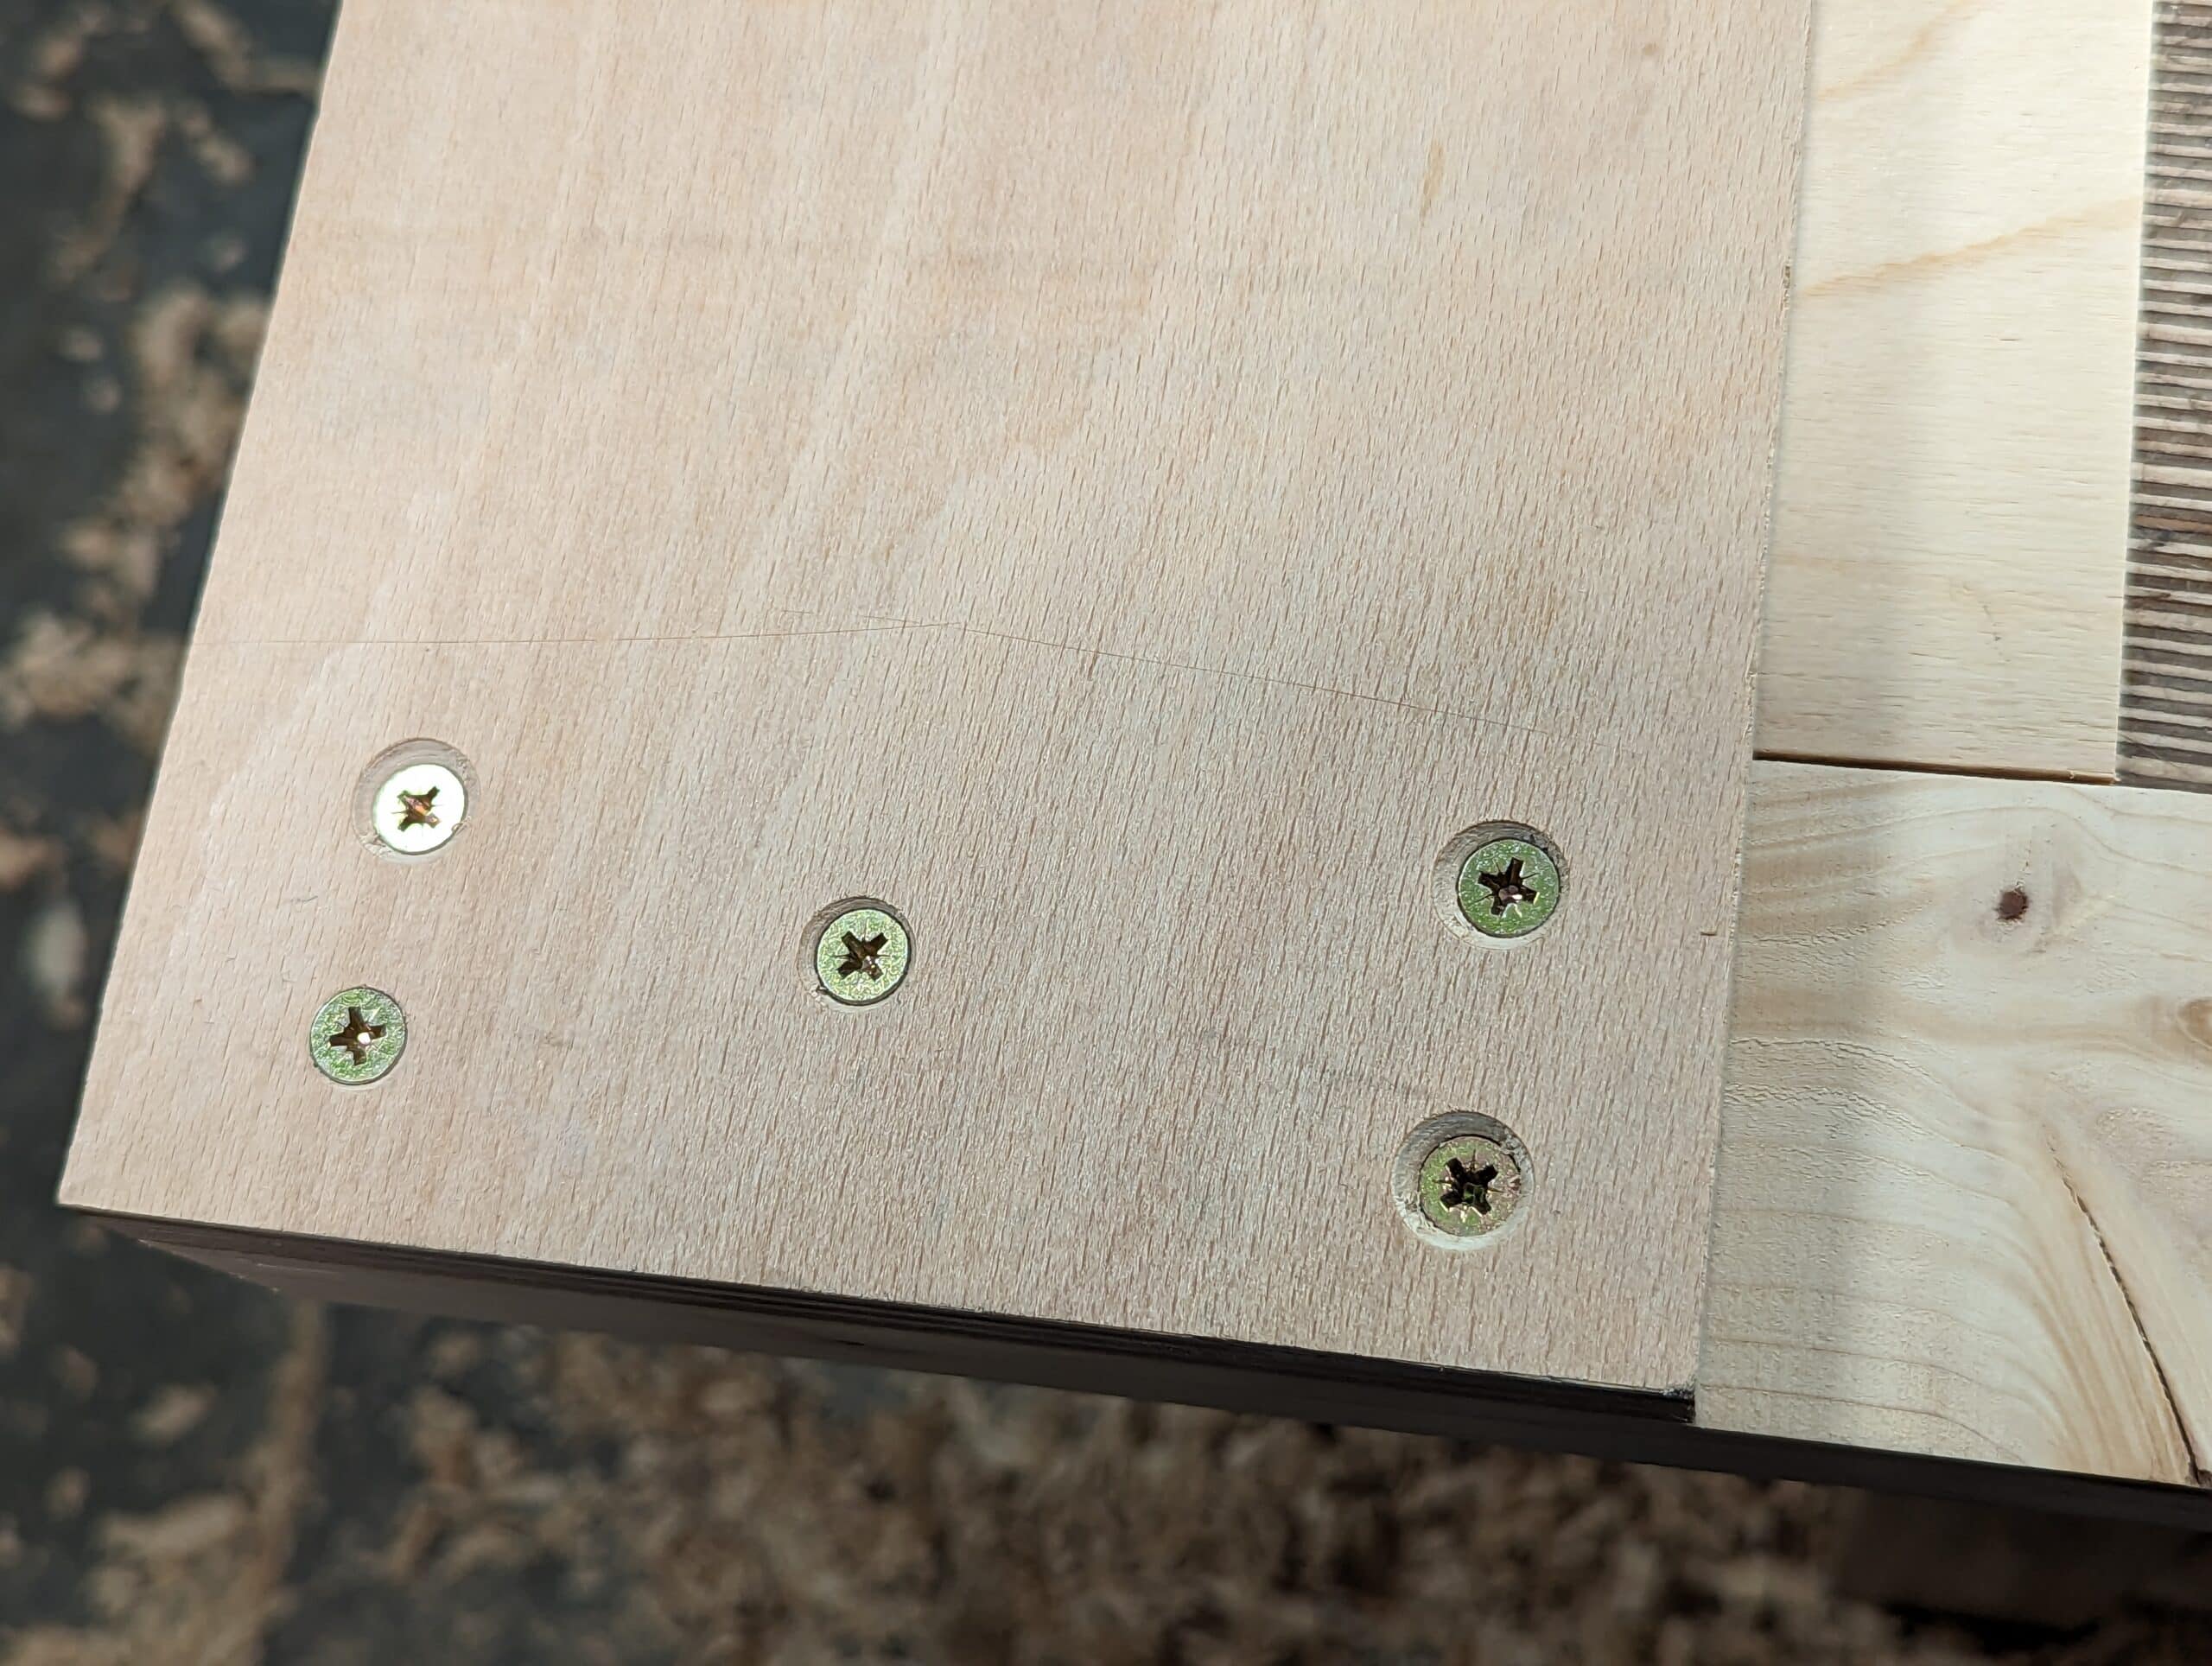
Add the second two-by at the other end of the plywood and do the same if indeed you do want to use the other end as a carrier guide too. You can of course glue these areas behind the screws but with these screws in place, it’s already rock solid . . .

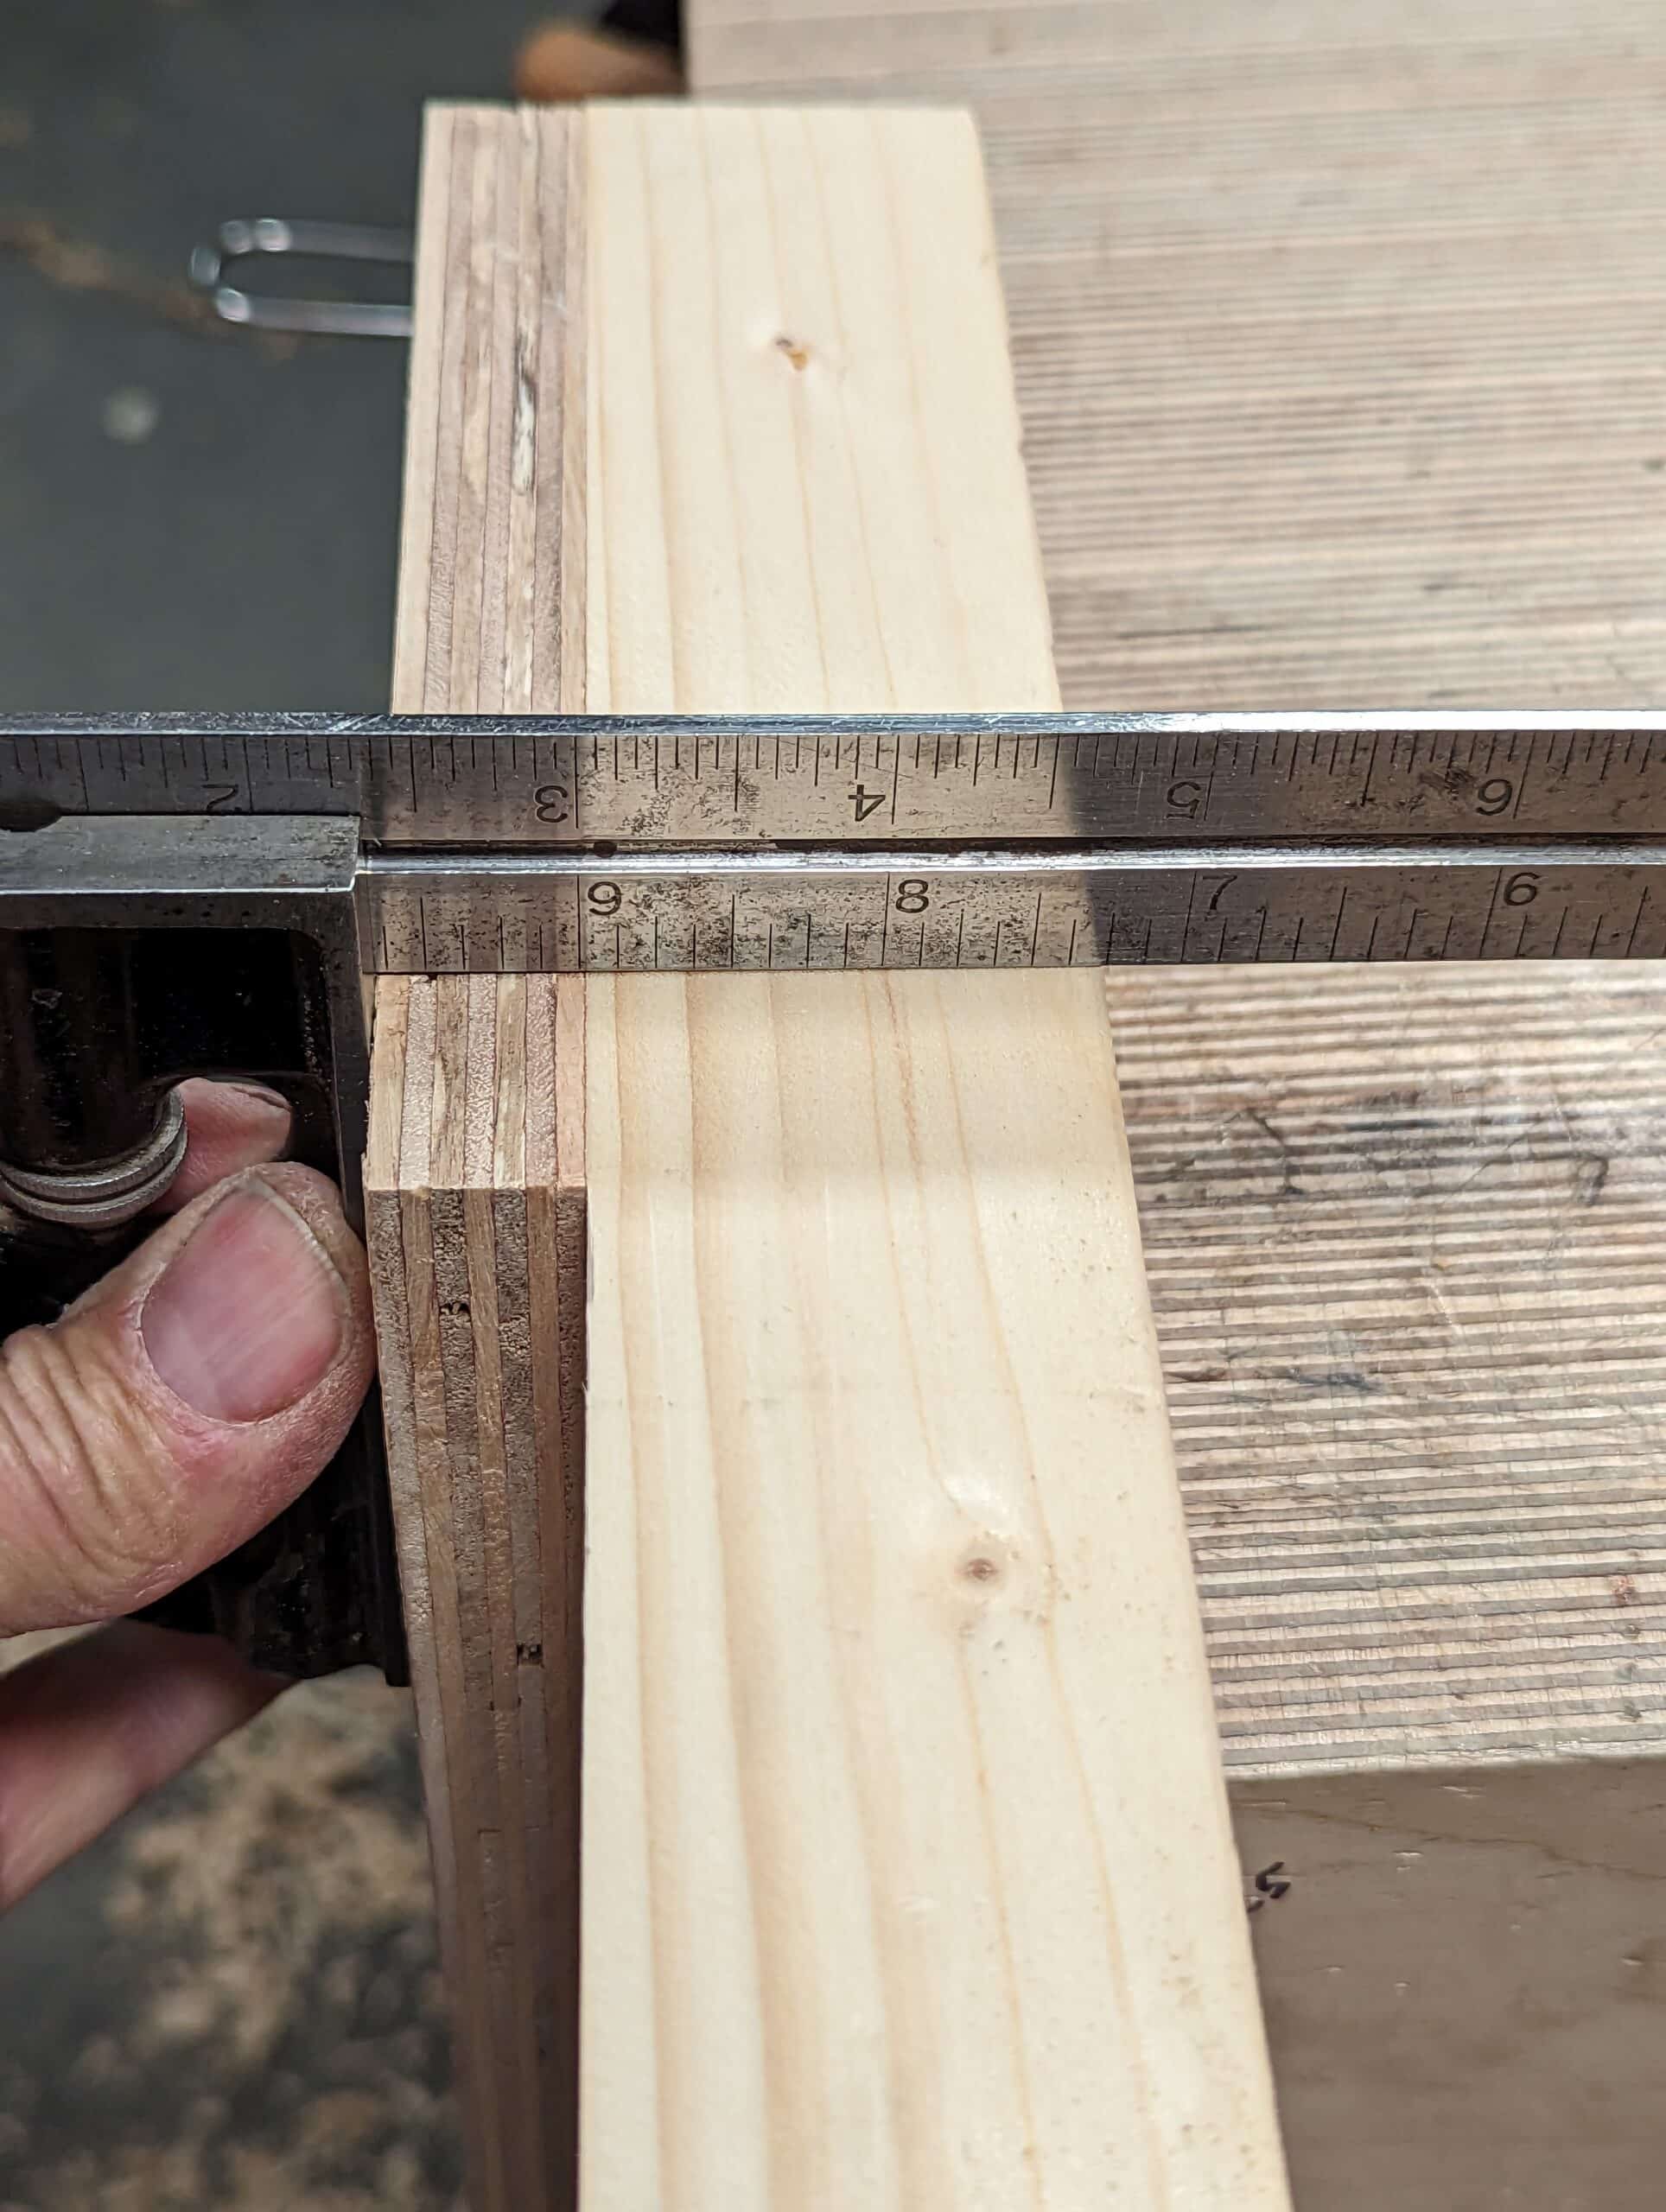
. . . and in between the upper and lower carrier, I added a piece of plywood to align short pieces to.
The 3/4″ plywood takes care of most wood that I use up to 3/4″ thick. If I want more thickness I just add a layer of plywood to the existing one with a couple of screws. Adding a layer doesn’t need to be the full length as the material will register just fine on the original first piece. This added piece is just to catch the outcut as support for the fibres of the wanted piece.
Using the carrier relies on the wood and the support carrier being clamped together in the vise and not the plywood part.

When you clamp the wood and carrier in the vise ensure that the long axis of the wood fully registers against the long plywood edge. I often tap with my chisel hammer to this end but I also will clunk it against the round bar of the vise which does the same. Once pinched tight, you can micro-adjust the end of the wood being planed. I always combine the guide with the establishing of a knifewall all around my wood. This way I can align my knifewall with the edge of the carrier.

With everything locked in the vise, sit the plane on the carrier and in the usual planing manner take the first pass keeping the heel of the plane registered first on the carrier and then too on the high corner of the end grain of the wood. Usually, this will be the corner of the wood up to and against the carrier and to your right. The first strokes you take may give very short contact with the wood and seem unproductive but each subsequent stroke will take more and more until the final clear cut resolves all the end-grain trimming dead square.
You can of course use the carrier for long-grain trimming on short sections of wood too, by the way.
In the more recent pieces have made I have had upwards of 800 pieces needing end-grain perfecting. Even freehanding would have taken me longer because with this guide there is no hesitation. The guide should take no more than ten minutes to make, by the way.

Oh, and I used it on this box.
Thank you for your wisdom and all you share with us.
LOL what a great idea. It reminds me of a shooting board turned on it’s edge.
I laugh because my bench space is always at a premium and adding anything to the surface can be awkward. OTOH the operator side of my bench is always dynamic I’m always ready to make some small change to improve holding in the vice… or is it vise?
Thanks Paul.
Does this also help you trim a mitre?
It can.
Obrigado, muito obrigado. Deus lhe abençoe.
Curious to know where and how you store your guide for quick access when not in use? Thanks.
Anywhere it fits, like saw horses, shooting boards, sharpening bits and bobs.
“But the issue with shooting boards is they take up valuable bench top space and always displace the in-use tools you need minute by minute and that means a lot of shuffling between tasks on a continuing basis.”
So true.
I guess the upper carrier sits on the top of the back jaw of the vise.
No. The upper carriage is locked in the vise with the wood hence everything is locked immovably together.
1. I undertstand the piece must be locked tight against the the upper carrier.
Maybe, having the carrier wide enough to sit on the vise rods while being proud of the top of the vise jaws might help positionning in the vise.
Obviously you don’t feel it necessary; but your hands are most probably stronger than mine.
How much proud? ~1″ ? as one needs to pinch the piece against the carrier while positionning.
2. Do you sometimes use the lower carrier? it adds wheight.
How does this guide get used to make mitres? Or is the mitre part not related to the use of this guide?
Is there a video that demonstrates making perfect free hand mitres without a guide so we can see how this is done?
It’s not meant for mitres at all although it would work for that with an angled support.
It’s not intended for mitres., Mike.
Mike,
I’m thinking you could make a mitre version of this if you wanted, using the exact same materials’ list. If you imagine the two 2x2s across the top and bottom, joined by the plywood at the 45 degree angle to make a Z shape. The infill piece that sticks out to provide extra support for smaller pieces would have to stick out at both sides, so you’d need an extra infill piece or a single larger one. It would operate in exactly the same way. The only thing I’m not sure about is whether you’d have enough space to clamp the workpiece, when it tails off under the vise. I can’t quite tell if this is the case in Paul’s design or not, but if you were to use the 2x2s as a sort of bench hook over the top of the workbench, hanging down, then that would assist with the holding and require less clamping pressure from the vise. Hopefully you get the idea, I’m not great at expressing in words!
Thanks,
Rico.
Another fantastic idea, thanks for sharing!
It looks very similar to the square end plane guide you made a while ago, just faster and easier to make.
An I correct in saying that the guide should be against bench side of the vise and the piece being planed on your side? For a left handed person then guide on the left, plank on the right correct?
Thanks, and have a great week.
Yes, that is all correct. If you do as I say and have a second carriage on the other side then you have both left and right handed version in one guide.
Thanks for the info! I’ll make one soon. It seems much more efficient than a shooting board.
I don’t quite understand. In the second paragraph, what do you mean by “ I just set the guides to 45º and push.” What guides are you referring to? Looks like the “guide and support” was for squaring end-grain only. Did you make another guide and support for mitres as well?
Also, could you elaborate on the use of the knife wall? I assume it is used as a visual guide for the plane, is that correct?
Finally, could you please give e a reference to the mortise jig/guide that you mentioned in the article?
Thank you for all the experiences and tips you share, Paul. I am a long time follower and have found them to be both inspirational and invaluable.
That was tongue-in-cheek. Where I said what I said I was saying I didn’t need any guides because after so many years of making I could do it mostly without. The knifewall is the ultimate stopping point. But when it is aligned with the carrier it is only used as a visual to confirm you are down to the level you want. Here is the mortise guide system I use:https://www.google.com/search?q=paul+sellers+mortise+guids&oq=paul+sellers+mortise+guids&aqs=chrome..69i57j69i64.8703j0j7&sourceid=chrome&ie=UTF-8
I am nearing my 72 birthday and I’m still learning from you. Thanks for passing on the information and tips!
This works on the same principle as the donkey ear shooting board, but I don’t understand why is this method better than a shooting board? Yes, some end grain is harder to shoot and this would work like a dream, but other than that why do prefer this method over the shooting board?
It’s really nothing like the donkey’s ear shooting board. I didn’t say it was better, just very practical and handier not having to clear the workbench and occupy the highly prized space needed for working and tool placement as I work––the much smaller footprint. I thought that I made that clear. Another thing is that the wood is locked solid and immoveable until you want it moving. I do prefer it to the shooting board for square and parallel stock but I didn’t say I preferred it in the article.
Hi Paul, I do love my shooting boards and have three for different operations.
That said I can see that your guide would be better for wider boards where a shooting board would not be ideal. An 8 inch board would require a really long shooting board.
I think part of the answer was contained in the original post—the board takes up less real estate on the bench. I’ll venture a guess as to other reasons: At least for me, this board allows one to stand in a more natural position in relation to the work piece and allows your body to push the plane forward in a more consistent fashion. Also, holding the plane bottom side down allows gravity to help you do the work and to keep the plane stable in a consistent horizontal and vertical position (that is, the plane is held in the “normal” fashion as planes were designed to do. I also suspect that it helps one see the work piece better.
Great idea, simple and easy to use with a more natural motion, and doesn’t take up bench space or require clearing to put it down on your bench top. A much better way to apply pressure and guide to the end-grain and get a better feel/senses/feedback. Plus I don’t like grabbing the side edge of the cold plane on the shooting board, just doesn’t feel right, especially on a cold winter’s morning.
Thanks Paul, I can see the advantages of this for sure!
Many thanks for continuing to share your knowledge, and encourage the rest of us.
Hello, Paul:
I found this in Tik Tok. It is surely your phylosophy: hand tools withouth fearof mechanical tool. And what wonderful door!
https://vm.tiktok.com/ZGJbSoGJy/
It seems the plane iron will be cutting into the guide a little at a time. How often have you found the need to true the guide.
It only cuts the guide if you are careless. I made a whole wardrobe and a chest of drawers with the guide and checked at the end and it was still square all round. But even so, it is not any sizeable issue. Maybe less than the merest fraction. I’d say two or three onion skins for me. The real point without introducing problems that really are not there is that the efficiency of truing up say 500 end grains puts everything into perspective surely.
one has to use the plane askew:
with the plane heel on the carrier and the plane blade on the piece.
So basically a shooting board used vertically. Some workers use a shooting board and run their plane on the benchtop, a shooting board without a designated run for the plane.
I’m not sure what the point your are trying to make is really. No, it isn’t one and the same but a highly simple method I have never seen used anywhere before. It literally took my five minutes to make from scraps and that makes this worth my time to pass it on and then hundreds if not thousands will enjoy the simplicity and be able to speed up their work without crowding out their workbench. That’s really all the point was in me taking the time to write it up and pass it along.
I’ll give this a try. I can certainly see the advantage of using two hands with the work clamped as opposed to the shooting board, single hand and unclamped workpiece.
Thanks.
I would think one advantage of this guide is that you can get you shoulder behind the plane better.
Nice. Do you have a strategy for using this guide if the board you happen to be end planing is longer than your bench (+ a bit of the guide) is tall?
Hi Paul,
I know what you mean about the bench not having room. Mine seems to get cluttered within about 5 minutes of starting off with a clean bench. I was thinking of making a high level angled tray above the bench. High enough not to get in the way but not too high that I can’t reach tools I put on it for temporary storage while working. Not sure if it would work or not.
Also, I designed my shooting board so the back edge sits over the front lip of my bench and I extend the (Record) vice to support the rest of the board. Works well and doesn’t consume any bench space. Just an alternative idea for anyone out there.
Cheers Paul keep up the good work.
The tray idea is something I’ve contemplated myself. One could easily make one that hangs on the tool well edge, with space for the most used tools – marking gauge, small saw, a few chisels, pencils, rag-in-a-can in a “swipable” position, card scraper, marking knife, square.. Fine Woodworking have a nice looking version, and I’ve seen another version that looks like the top portion of a pulpit.
Another solution, if you have the space, is to build a support table. I made one that is placed up against the wall behind me (my work bench stands out on the floor). There I have my sharpening kit permanently placed at the ready (with a good light that has a magnifying lens) as well as ample space for bits and bobs I need during a project, for example a marking gauge set up for a particular measurement or what have you.
I also have a small box (dovetail exercise) where I keep my measuring and marking tools. It is easily moved about, and I can drop the tools in there in stead of keeping them on the bench top. This works well to keep my work area uncluttered.
Several ways to skin the cat, I guess.
Love your shooting board idea – absolutely an alternative!
Which gives me an idea – what about a “bench hook” that could be inserted into two deep dog holes on the face of the apron? A couple of dowels, a 2×6” block of wood and a hook that is placed on the edge of the bench and extends out 15-20cm.
Lots of ways to manage in tight spaces. 🙂
I made my bench 200cm long. I usually have ample space for my shooting board / bench hook to my right, except for larger (longer) projects.
Well, it seems to sound good but 95% of benchwork depends on using the vise in tandem with the fore-part of the benchtop where the tools are so I am not sure this offers an advantage at all. Now I do understand that the shooting board is not one and the same thing as my contrivance which does not nor is it intended to replace the shooting board per se. I put this out purely as an alternative to help save time and space so it’s not comparing apples for apples. If I had a choice over a shooting board over my vertical end-grain trimmer I would choose the latter simply because I end-grain trim every day and several times a day.
I never liked to use a shooting board. It hurts my hand to hold the plane so awkwardly when it’s laying on its side. I usually do the circular motion planing thing, with the workpiece held in the vise, working to a knife mark. Oftentimes unsuccessfully though, when I overshoot and end up breaking off a corner. I have thought of clamping a backer piece in order to prevent this. But this method, maybe though Columbus’s egg, is of course a great step up from that and looks like it will suit me perfectly.
Nice. And one could easily make a 45 degree version (or any other angle).
Thank you.
yeah but he used screws oh the rust the rust will explode the wood lololol.
dizzing level of mastery here!!! free for the asking!!! skilled woodworking vs. the machines.
if only you called it The World’s Best you could make more moneyy 😉 never needs sharpening, never needs anything. super duper! think of all the things people dont do because they worry abput getting rich…when the things that rich people do with money has everything to do with feeling rich inside. you gotta get rich to enjoy the thing you would do of if you didnt have to worry about money. what a world!
thanks for another great solution for everyday problems. So simple and obvious…once you pointed out. I assume the heavier 2X4 as opposed to 1X4 is to provide a wider base to keep the sole of the plane flat on the wood.
Thank you for the tip, Mr Sellers . I have made one and so far, for me, I have more success with a #5. Of course with more experience it may become easier with a #4, due to it being lighter.We shall see. As far as a shooting board, I have used a set of bench hooks 90% of the time. I always use two so that I can work any length accurately. I also take care to make sure the stop is very square to the base. The hooks don’t take up anymore room than the board itself so it works for me.
Hi Paul. I’m making your frame design for a mirror and noticed you are using an oil finish rather than shellac or a water born finish. Is there a specific reason for this – might one of the others cause the veneer to lift? I ask as the mirror I’m making is going into a bathroom, so I was going to use one coat of shellac and then cover with two of the water born to fully seal it. I’m using ash as the framing wood and a mix of English cherry and sappele for the veneer.
I don’t really get into brands of products because the manufacturers are so very deceptive in their marketing terms and use disingenuous terms like ‘oil’ when there is no oil in their product or ‘natural’ when the natural part of their product description. is actually the naturally occurring colour rather than any part as a product. Take Danish Oil as an instance. There is nothing Danish about Danish Oil. You could just go with shellac alone with several coats and see how it does. They used it a lot on ships and boats through the centuries and it is surprisingly durable. you can’t really lose anything if you need to recoat it because too many people spend too long in the shower. That said, you can do as you say and topcoat with waterbourne finish.
A nice jig. I don’t own or use any jigs and my results were always worse using a jig. Even stranger is all my crosscut,dovetails, sliding dovetails and tenon’s are cut using a Atkins silver steel 16″ panel saw in 9tpi rip. A wall full of tenon and dovetail saw but nothing matches the Atkins for me. The handle is perfect for me.I can see where this jig have merit, for speed.
Thanks Paul. I will try just with the shellac and see how I get on. I’ve been really pleased with the veneer cutting, which I thought was going to be horribly fiddly, but has come out really well. I haven’t tried to cut and fit it yet mine, so I could be speaking too soon. But the effect is really pleasing and I can see me making more frames after this.