
Shooting Board with Attachments
I have been meaning to make a shooting board for a while, but I wanted to make it versatile and adaptable for more than one situation.
So I came up with this shooting board that can hold different attachments just by making a simple dado in a block of wood.
In case you don’t know what a shooting board is, it’s a way to easily clean up and square up a cut with your hand planes. It is most typically used with hand saws… chances are you will not cut a piece square and flat with your hand saw, so the shooting board fixes any wonky cut. It’s not only for hand tool users though, it could also be used when woodworking with power tools.
Ever try cutting a miter for a box on a miter saw? It’s not always perfect, that’s where the shooting board comes in. Even if your cuts are perfectly straight and square fresh off the saw, sometimes you need to shave a hair off to get the perfect fit. This can be challenging with power tools, so that is where the shooting board really shines!
This shooting board can shoot:
1) End grain for squaring up a cut
2) Edge grain for jointing boards to prepare them for glue up
3) Short miters, like for frames
4) Long miters that are longer than your plane blade, like for boxes
5) Face grain on thick or thin stock
And since the attachments go on really simply, the possibilities are endless! You can make a fence for whatever angle you need!
Check out the full build video below!
Links below are affiliate links, clicking on them helps me keep this site going at no extra cost to you ;)
Dimensions
12” x 24”
I decided to make the bottom base of the shooting board out of 1/2” plywood. It’s best to use sheet goods since they are more stable and will remain flat.
I ripped the 1/2” plywood to be 12” wide.

Then I laid my hand plane on it’s side, making sure the whole side of the plane was supported on the plywood. I measured from the sole of the plane to the edge of the plywood to get the correct width for the top section of the shooting board. (This was about 9-3/4” wide)

For the top section of the shooting board I decided to use 3/4” MDF since it needs to be really flat and stable.
I ripped the MDF to the width I got above, about 9-3/4”.

Then I cut both the plywood and MDF to 24” long.

Here’s a tip I learned from Rob Cosman’s shooting board video…
The edge of the shooting board where the plane rides can get chewed up and ruined as the blade hits it over time. To avoid this, you can make a very small rabbet on the top section of the shooting board.
To do this, turned the plane on its side and measured the thickness of the small part thats underneath the mouth of the sole. In my case this was 3/16”.

Then mark 3/16” on the top section of the shooting board (MDF) and make a very small rabbet, like 1/16” deep, so that a small little 3/16” lip is left over. (In the picture below, the MDF is actually upside down, the lip is being created on the top of this cut, but that lip will actually be the bottom of the board…. The next picture will explain this better.)
I did this with a straight bit at the router table, but this can also be done at the table saw.

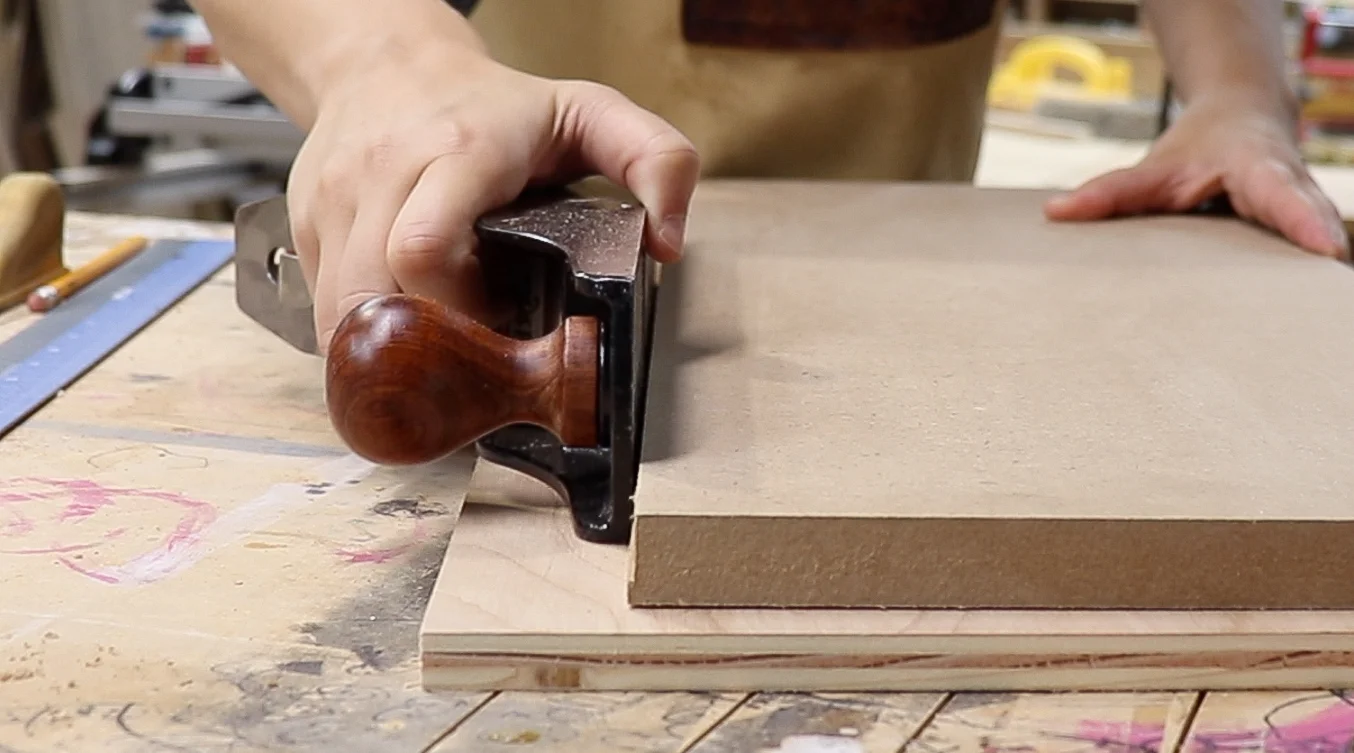
Now the MDF board is oriented correctly and the lip that was just created on the router table is on the bottom.
You can see a small 1/16” gap between the sole of the hand plane and the side of the MDF, but the sole of the plane is still butt up against the MDF because of the little piece thats under the mouth of the sole.
Now the plane will ride smoothly against the MDF without chewing up the edges, awesome!
Moving on…
Now… this is the key to this whole adaptable shooting board and it could not be any simpler.
I set up a 1/2” straight bit in the router table and set the height so it cuts about half way through the 3/4” MDF.
Then I passed the MDF over the router bit so the groove will be cut across the top of the MDF. (At this point you just want to make sure the this groove is being cut on the opposite side of the lip that was created in the previous step.)
The location of this groove was arbitrary. I just made sure to leave a couple of inches between the groove and the back of the jig.
This step can also be done on a table saw by making multiple cross cuts with a single blade or one pass with a dado blade.

I used a 1/2” router bit to make the groove, so I found the straightest pieces of hardwood scrap in my shop and planed it to 1/2” thick so that it would fit into the 1/2” groove with a super tight friction fit.
This piece is going to be the main fence that all the attachments will lock on to, so you really want to make sure it is a friction fit into a 1/2” groove.
If this main fence piece fits too loosely in the 1/2” groove, the 1/2” cuts you will make for the attachments will not fit well.

The main fence will be used to lock on all the attachments, but it will also be used to plane the faces of thin stock…. So I temporarily placed the fence in the groove and marked about 1/4” up from the top of the MDF then ripped it to size at the table saw.
Ripping it so that only 1/4” will be sticking up from the top will allow me to plane the faces of thin stock without any clamps getting in the way.

All the main parts of the shooting board are now prepped and ready to assemble!
I predrilled and countersunk some holes in top of the MDF piece before gluing it.
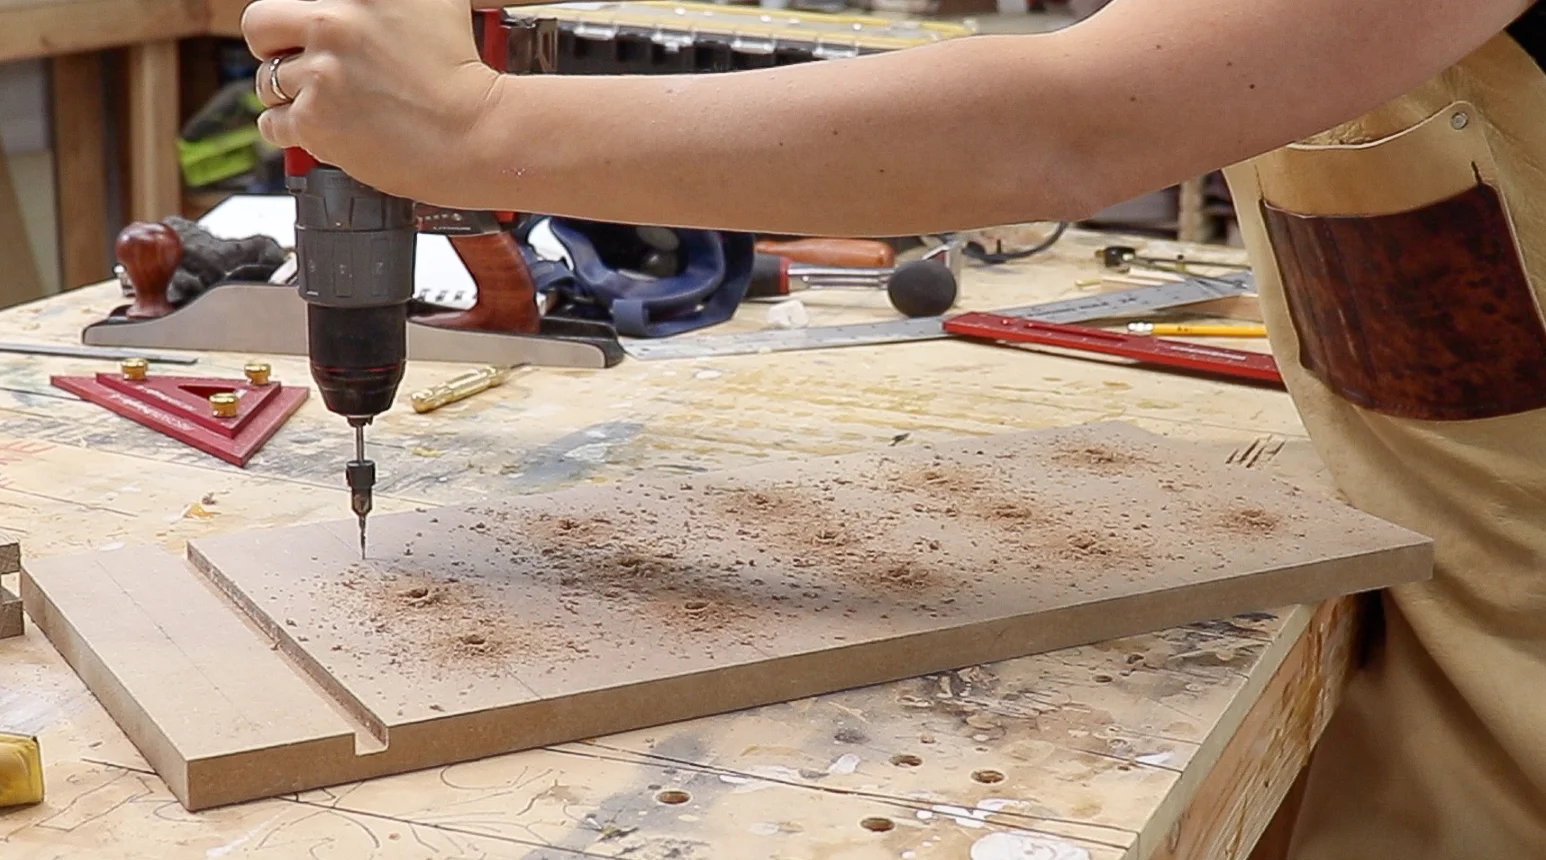
Then I glued the MDF top to the plywood base and locked it all down with screws.

Then I glued in the main fence.
I made sure not to use too much glue, to avoid too much squeeze out.

The last bit of the shooting board is the bench hook.
This piece is attached to the underside of the front of the jig and it butts up against the workbench so you don’t need to clamp the shooting board down.
I just cut a scrap to the width of the plywood (12”) predrilled and countersunk some holes.

Then glued and clamped it to the underside of the front of the jig and locked it into place with screws.
The base of the shooting board is all done! Time to work on the attachments!

The first attachment is just a regular tall fence. This will be for shooting endgrain square and shooting edge grain for jointing.
I took a thick scrap piece of white oak and cut it to the width of the MDF top.
(I set my stop block to this measurement so I can easily make all the attachments the correct width.

Then I made a groove in the oak fence using the same 1/2” bit I used for the groove/dado in the MDF.
Since this groove will lock onto the main fence I glued into the MDF top, and the main fence is protruding up 1/4” from the top, I set the bit to cut this groove slightly higher than 1/4”.

I chamfered the corners of the main fence a bit to make it easier to put the attachments on.

You can see in the picture below how these attachments will work. They simply lock onto the main 1/2” thick fence with a groove made by a 1/2” router bit. Super simple!
Here is the reason why I went through the trouble of placing the main fence in a groove…. It ensures that everything will remain square…
On to the second attachment!

This second attachment is a miter fence. This will be to clean up short miters (shorter than the plane blade), like for frames.
I cut a scrap piece of plywood to the width of the MDF (about 9-3/4”), then set it up on my cross cut sled to cut 45 degrees on one corner.

And that’s all there is too it!

I just needed to add the 1/2” groove to the underside so it can lock on to the main fence and it’s done!

The last attachment is for long miters, like for box parts. These pieces are too wide to use on the regular miter fence because they are wider than the plane blade, so they need to be held at a 45 degree angle to the plane.
This type of shooting board is also called a “Donkey’s Ear”.
To make it, I took some scrap 1/2” plywood, ripped it to an arbitrary width, and then made one cross cut with the blade set to 45 degrees to make the two main pieces of this attachment.

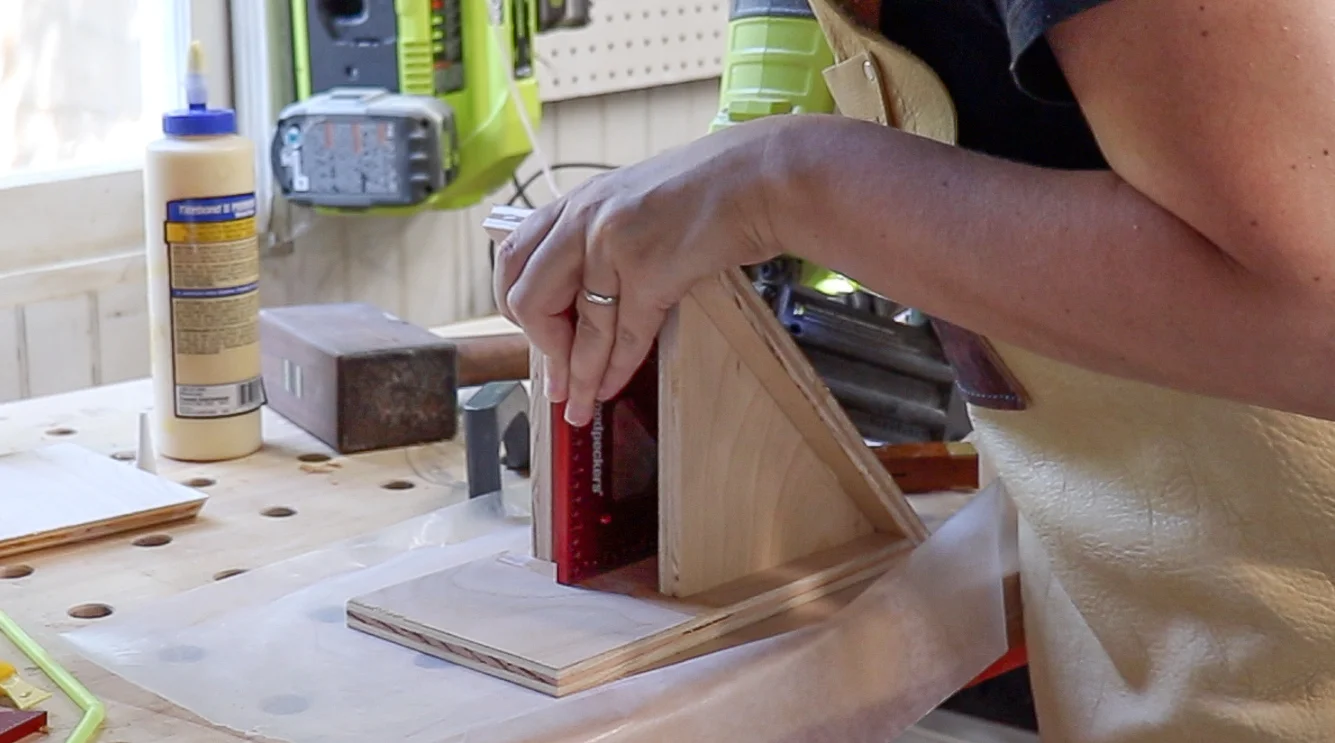
I placed a triangle that I know is exactly 45 degrees in between those two pieces while I glued and brad nailed them together.

Then I cut two triangles using my miter jig for the cross cut sled. These triangles will act as supports for the jig, so you want to make sure the corners are exactly 45 degrees.

I then placed those triangle supports inside the jig, glued and brad nailed them in place.
Back to the router table, I made the 1/2” groove on the underside of the “Donkey Ear” so it can lock into place.
(We’ll get to that fence in a moment. It was only on there temporarily, I will add a more permanent fence in a bit…)

I placed the “Donkey Ear” on the shooting board and realized the main fence was protruding slightly. This is preventing the workpiece from laying flat on the jig, so I just used my hand saw to cut off the excess that was protruding out.

Now let’s talk about the fence. The workpiece needs a square fence to lay flat against while shooting these miters, so I glued a piece of scrap walnut that was thicker than the 1/2” plywood onto the edge of the jig.
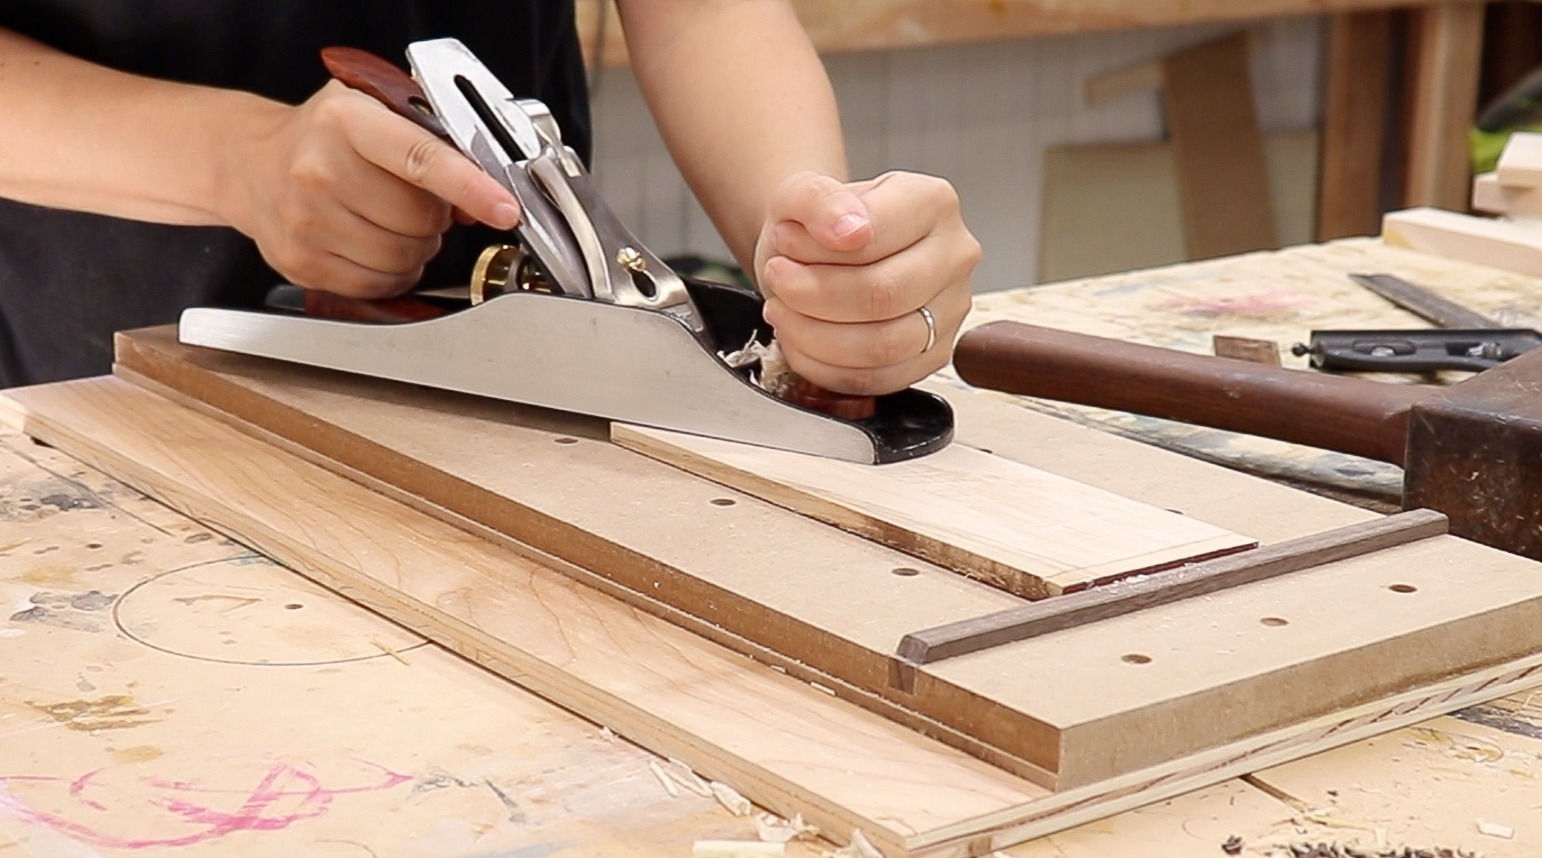
Now all the attachments are done! Let’s get into some of the features… Before using the shooting board, you just have to make sure your plane is cutting perfectly square.

With just the skinny/low fence in the jig, you can easily plane thin stock without any clamps getting in the way.
Since the jig is just supported by the bench hook there are no clamps or vises needed at all. Love it.
The tall fence serves 2 purposes, shooting end grain square….

And Shooting edge grain square. This is great for jointing boards to prepare for glue ups.

The miter attachment is great for cleaning up wonky miter cuts or just refining a cut to get the perfect fit.
I’m excited to use this for frames.

And last but not least the “Donkey Ear”. This is for miters that are wider than the width of the plane blade.
I am so excited to use this on an upcoming box project.

What’s great about this set up is how easy it is to add on a new attachment.
I needed this for 45 degree miters, but let’s say I am making a hexagon, I can just quickly make an attachment with the desired angle, cut a groove on the bottom and I would be good to go!

Off to go finish up that box project!
